

Key Takeaways
Why packing strategy affects more than just comfort
Most drivers treat car packing as an organizational nuisance - something to get through quickly so the trip can start. In practice, how a vehicle is loaded affects its handling, braking, fuel efficiency, and the safety of everyone inside. A poorly balanced load raises the center of gravity and shifts weight distribution in ways that amplify during highway lane changes or emergency braking. This isn't a corner case; it's basic physics that applies to every loaded vehicle on every drive.
There's also a legal dimension. Obstructed rearview visibility violates traffic law in most states. And items left loose in a cabin - a water bottle, a laptop, a heavy bag on the rear deck - can become projectiles at highway speeds in a crash or hard stop.
For families, the stakes are even more concrete. See our guide on traveling with kids in the car for specific strategies around child safety seats, in-cabin organization, and keeping younger passengers comfortable over long stretches.
What you will need
What you'll need before you start loading
Gathering the right packing tools before you begin saves the frustration of mid-load problem-solving. The items below aren't luxuries - they're the difference between a load that stays where you put it and one that redistributes itself at 70 mph.
Soft-sided duffel bags
Conform to irregular trunk shapes and compress to fill gaps more efficiently than hard-shell suitcases.
Collapsible cooler
Keeps food and drinks accessible without permanently consuming trunk space once emptied.
Cargo net or trunk organizer
Prevents loose items from sliding or becoming projectiles during sudden braking.
Roof cargo carrier or bag
Expands storage for bulky, lightweight items like sleeping bags without cluttering the cabin.
Small backpack or tote (grab bag)
Holds daily-access items - snacks, chargers, medications, documents - within arm's reach inside the cabin.
If your trip involves mountainous terrain or extended highway driving, also review how load weight interacts with your vehicle's performance. Our article on how elevation and terrain affect your car's performance covers what drivers should know about added weight at altitude and in heat.
Step-by-step: packing your car the right way
Follow these steps in order. Each builds on the one before - loading heavy items before soft bags, and securing everything before checking sightlines - so skipping ahead creates rework.
Audit your gear before anything goes in the car
Lay every item you plan to bring onto a flat surface. Divide everything into three categories: must-have (safety gear, medications, documents, weather-appropriate clothing), nice-to-have (extra entertainment, backup shoes), and leave-it (anything you're bringing "just in case" without a specific scenario in mind). Cut the nice-to-have list by half. The leave-it pile stays home.
This step prevents the most common road trip packing failure: loading the car and then discovering you have no room for the items that actually matter.
Check your vehicle's load limit
Every vehicle has a maximum payload rating - the total weight it can safely carry in passengers and cargo. This figure appears on a sticker inside the driver's door jamb and in your owner's manual. Exceeding it puts undue stress on tires, brakes, and suspension, and can affect handling in ways that matter most during emergency maneuvers.
Add up the weight of all passengers and estimate your cargo weight. If you're close to the limit, prioritize people weight and trim cargo further.
Load heavy items first, low and centered
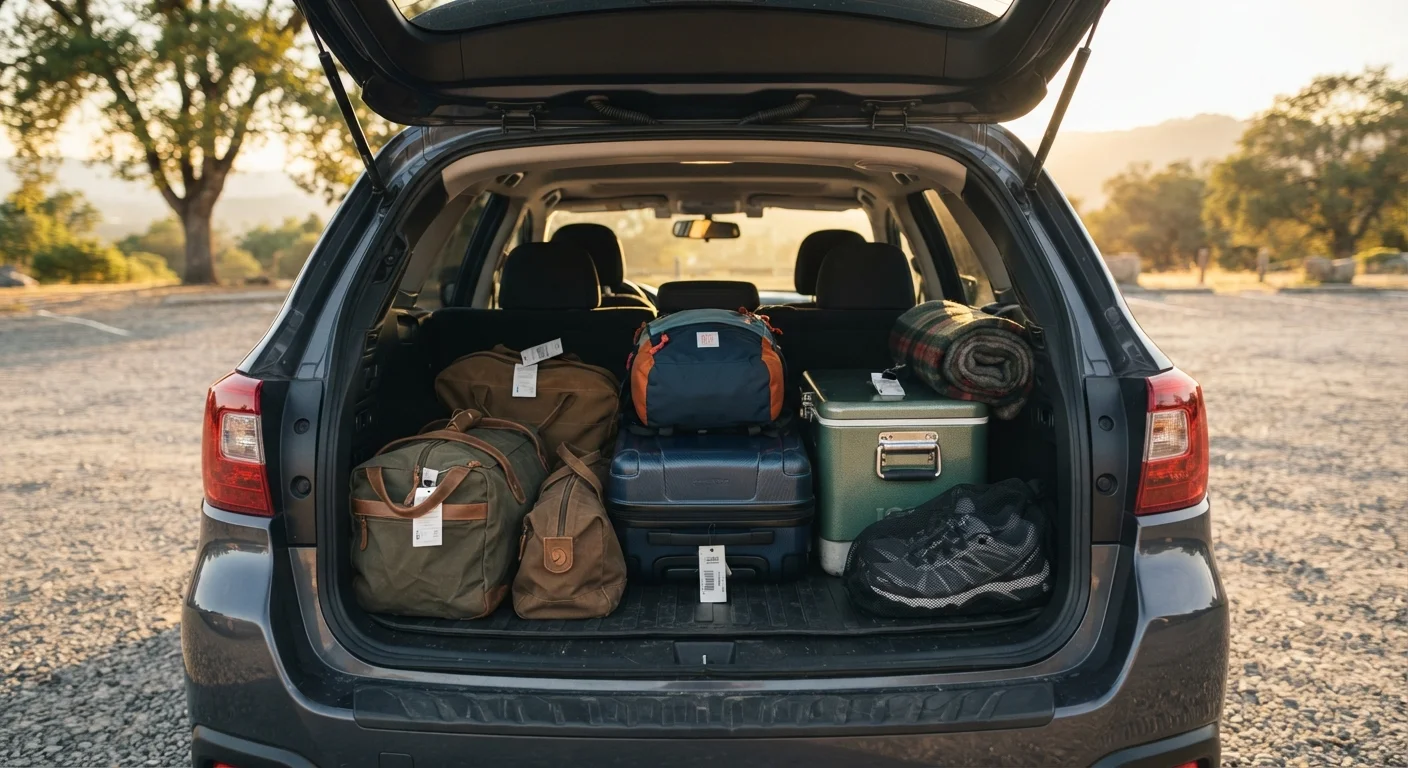
Place the heaviest items - full coolers, tool kits, large water containers - directly on the trunk floor, as close to the center of the vehicle as possible. Low placement keeps the center of gravity down, improving handling and reducing body roll in turns. Centering side-to-side prevents uneven tire wear and pulling.
In SUVs and hatchbacks, heavy items go against the rear seatback, not pushed to the tailgate end, which would shift weight rearward and lighten front-axle steering response.
Fill in with soft bags and flexible items
Once heavy anchors are in place, pack soft duffels and clothing bags around them, filling voids and irregular spaces. Soft-sided luggage conforms to whatever shape remains, making far better use of trunk volume than rigid cases. Squeeze rolled clothing into gaps between larger items.
Leave a clear lane from the rear window to the rearview mirror. You are legally required in most U.S. states to maintain an unobstructed rear view, and it is a critical safety factor regardless of whether your vehicle has a backup camera.
Build a dedicated in-cabin grab bag
Pack one small bag or backpack that lives on the rear-seat floor or within easy reach of the front passenger. It should contain everything you need without stopping: phone chargers, a portable battery bank, snacks, water bottles, sunglasses, lip balm, any daily medications, and your printed or downloaded maps and reservation confirmations.
The goal is zero mid-drive rummaging. Digging through bags while driving is a distraction equivalent to texting. If it needs to be accessible, it goes in the grab bag - period.
Secure everything with a cargo net or organizer
Even well-packed trunks shift during driving. A cargo net stretched across the load, or a collapsible trunk organizer with dividers, prevents items from tumbling when you brake or corner. In a vehicle without a cargo cover, this step is especially important for keeping the load contained.
Check that nothing is pressing against the rear window defroster grid, blocking HVAC vents, or interfering with rear seatback release mechanisms - all are common oversights that cause real problems mid-trip.
Reassess sightlines and mirrors before you drive
Sit in the driver's seat and check every mirror. Your rearview mirror should show a clear view of the road behind you - not a wall of luggage. Check both side mirrors for adequate visibility of your blind-spot zones. If anything is compromised, repack before leaving; do not rationalize that your backup camera replaces mirror visibility.
Adjust mirrors after loading, since the vehicle's stance changes under load. On longer trips, run through a full pre-departure checklist to confirm the car is ready in every dimension - not just packed.
Pack out what you packed in - then some
Road trips accumulate: souvenirs, purchased supplies, discarded packaging. Before departure, leave deliberate empty space in the trunk for return-trip additions. Travelers who pack to maximum capacity on the way out often face a real logistical problem heading home.
Once your vehicle is loaded and mirrors are set, you're ready to move. For a broader view of everything that should happen before the first mile, the complete American road trip planning guide covers route planning, budgeting, and safety preparation from start to finish.
Common packing mistakes and how to avoid them
Even experienced road trippers fall into predictable traps. Here are the most frequent ones:
- Packing for every scenario: Bringing gear for unlikely contingencies fills space needed for trip essentials. Pack for the actual forecast and planned activities, not every conceivable what-if.
- Using the wrong bag types: Hard-shell suitcases waste trunk space because they can't conform to irregular shapes. Reserve rigid cases for fragile items only.
- Ignoring roof rack weight limits: Roof-mounted cargo raises your vehicle's center of gravity. Use a roof carrier only for lightweight bulky items, stay within the manufacturer's rated limit, and expect a modest reduction in fuel efficiency.
- Blocking rear passenger access: Packing the rear footwells solid means passengers have nowhere to put their feet - a fatigue problem on long drives. Reserve floor space in the rear for the grab bag and passenger comfort items only.
If you're traveling solo or as a couple on your first extended drive, what no one tells you before your first multi-day road trip addresses the broader logistics picture - including what packed-car fatigue actually feels like after day two.
Roof Cargo Raises Your Center of Gravity
Adding weight to a roof rack meaningfully increases a vehicle's center of gravity, which reduces stability during sharp turns and increases rollover risk in SUVs and taller vehicles. Always stay within the roof rack's rated load limit, distribute weight evenly, and drive at reduced speeds - particularly on curved or winding roads. Remove the carrier when not in use.