

Key Takeaways
Why Small Living Rooms Feel Cramped - and What to Do About It
A living room feels cramped not simply because of its square footage, but because of how that footage is used. Oversized furniture, poor lighting, and cluttered sightlines all compress a room visually - and the fix rarely requires renovation. With deliberate choices about scale, color, and arrangement, most compact spaces can feel genuinely comfortable and open.
Before rearranging anything, take stock of what the room currently has working against it. Are the sightlines blocked by bulky furniture? Is the lighting coming from a single overhead source that leaves corners shadowy? Is every surface covered? Identifying the specific friction points lets you address them directly rather than guessing. For a broader foundation on color choices, see our guide to decorating with color.
What you will need
Step-by-Step: Transforming Your Small Living Room
Work through these steps in order - each builds on the last. You don't have to complete every step in one session; pace the project across a weekend if needed.
Measure the Room and Map Your Furniture
Write down the room's length, width, and ceiling height. Then measure every piece of furniture you plan to keep. Sketch the layout on paper or use a free digital floor-planner before moving anything - this saves significant effort and reveals whether a new arrangement is worth attempting.
Identify the room's focal point (fireplace, TV wall, or a window with a view) and plan to anchor your seating around it. Traffic paths - typically at least 30-36 inches wide - should remain clear.
Edit and Right-Size Your Furniture
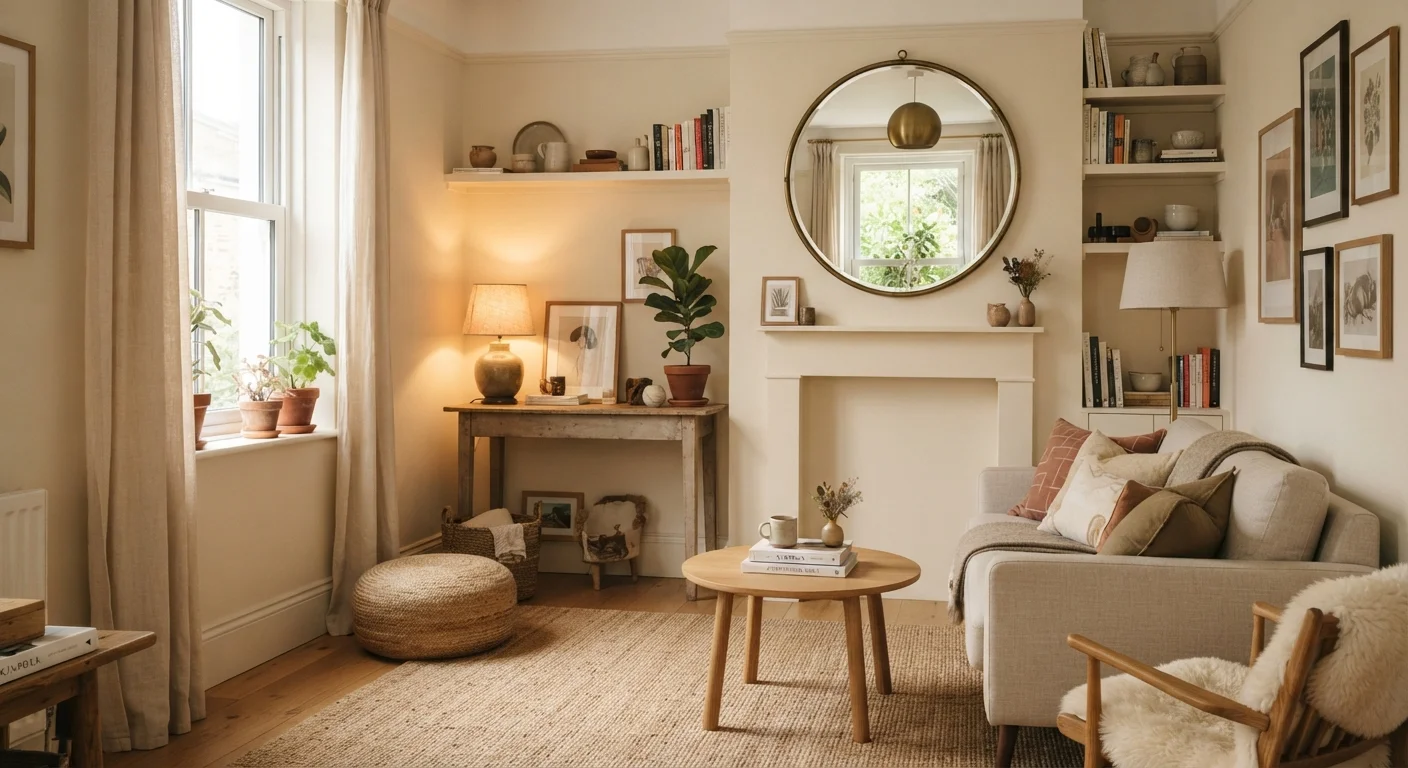
Remove any piece that doesn't earn its floor space. In a small room, fewer, well-chosen items almost always outperform a full set of matching furniture. Look for pieces with legs - sofas and chairs raised off the floor let light pass underneath, which reads as more open than furniture that sits flush to the ground.
Replace a large rectangular coffee table with a round or oval alternative, which allows easier movement and eliminates sharp corners in tight spaces. Nesting tables or a storage ottoman with a tray on top can serve the same function with far less visual bulk.
Choose a Light, Cohesive Color Palette
Pale, cool, or warm neutrals on walls reflect light and push walls visually outward. A single consistent palette across walls, large upholstery pieces, and curtains reduces the visual chop that makes a room feel smaller. That doesn't mean the room must be all white - soft greiges, pale sage, and warm ivory all work well.
Limit the number of distinct colors to two or three, and use the same tone across multiple elements. When patterns are involved, keep the scale varied but the color family consistent. Our guide to mixing patterns covers this in detail.
Hang Mirrors Strategically
A large mirror positioned opposite or adjacent to a window effectively doubles the perceived light in the room and creates the impression of a continuation of space. Floor-to-ceiling mirrors on a narrow wall can visually widen it. Even a gallery of smaller mirrors grouped together produces a meaningful effect.
Mount mirrors at eye level - roughly 57-60 inches from floor to center - so they reflect the room rather than just the ceiling or floor.
Layer Your Lighting
A single overhead fixture leaves corners dim and makes the room feel like a box. Instead, combine ambient light (the main overhead source) with table lamps or floor lamps at different heights, and one or two accent sources like a small picture light or an illuminated bookcase. This distributes light evenly and eliminates the shadowy corners that compress the room.
Use warm-toned bulbs (around 2700-3000K) in living spaces for a comfortable, expansive feel rather than cooler tones, which can feel clinical.
Control Clutter and Add Vertical Interest
Mount shelving high on the wall rather than relying only on low furniture for storage. Tall bookshelves draw the eye upward, making ceilings feel higher. Curtains hung close to the ceiling and dropping to the floor - even if the actual window is smaller - create the same vertical illusion at low cost.
Keep surfaces edited. A simple rule: for every decorative object on a shelf, ensure there is visible negative space beside it. If a shelf looks full, it's probably overcrowded for a small room. For low-effort updates that refresh the feel of the room without major purchases, see our guide to refreshing a room without repainting.
Test Before You Commit
Before buying new furniture or paint, live with the rearranged layout for a few days. What reads well on a floor plan doesn't always feel right underfoot. Similarly, test paint colors with large swatches on the wall across different times of day - lighting shifts dramatically from morning to evening and changes how a color reads in the space.
Common Pitfalls and How to Avoid Them
Even well-intentioned decorating decisions can backfire in small spaces. Pushing all furniture against the walls - a common instinct - actually makes rooms feel smaller, not larger, by creating a disconnected, hollow center. Grouping seating closer together in a conversation cluster and leaving deliberate space between furniture and walls often reads as more relaxed and spacious. For a full breakdown of placement principles, see our article on furniture arrangement fundamentals.
Another frequent misstep is treating every surface as storage. A small room benefits from visual breathing room - a few well-chosen objects on a shelf are far more effective than rows of knickknacks. If you're curious whether open shelving might work in your home, our piece on open shelving trade-offs explores the honest pros and cons.
Avoid Overcrowding With Decorative Accents
It's tempting to personalize a room with many small objects, but in compact spaces each additional item competes for visual attention. A curated selection of meaningful pieces - a plant, a few books, one piece of art - is more effective than many small accents scattered across multiple surfaces. When in doubt, remove rather than add.
Finally, don't ignore the ceiling. A light-colored ceiling reads as higher, while a dark one closes the room in. If your ceiling is already white, keeping it that way is a free win. Lighting matters just as much as paint - our guide to lighting layers explains how to layer ambient, task, and accent sources effectively.